
News
7 Powerful Glue Spreader Techniques for Woodworking
Welcome to My Blog!
I’m so glad you’re here. Before we dive into the content, I’d love to connect with you beyond this page. On my social media, I regularly share industry insights, product updates, and behind-the-scenes moments — plus, it’s a great place for us to interact!
Follow us on Facebook: Shandong Chuangxin Automation Equipment Co., Ltd
Let’s grow together and stay connected. Now, let’s jump into the blog — I hope you find the content informative, engaging, and truly valuable.
Table of Contents
Introduction
Woodworking is an art that requires precision, patience, and the right tools. One of the most underestimated yet essential tools in any woodworker’s arsenal is the glue spreader. A proper Glue Spreader ensures that adhesives are applied evenly across surfaces, creating strong bonds without wasting material. Poor glue application can lead to weak joints, uneven finishes, and additional sanding or repairs.
In this article, we will explore seven powerful Glue Spreader techniques for woodworking. These techniques are suitable for both hobbyists and professional woodworkers, helping you achieve cleaner joints, better efficiency, and superior results. Additionally, we will share practical insights, tips from experienced carpenters, and performance data demonstrating the effectiveness of each technique.
Understanding the Glue Spreader
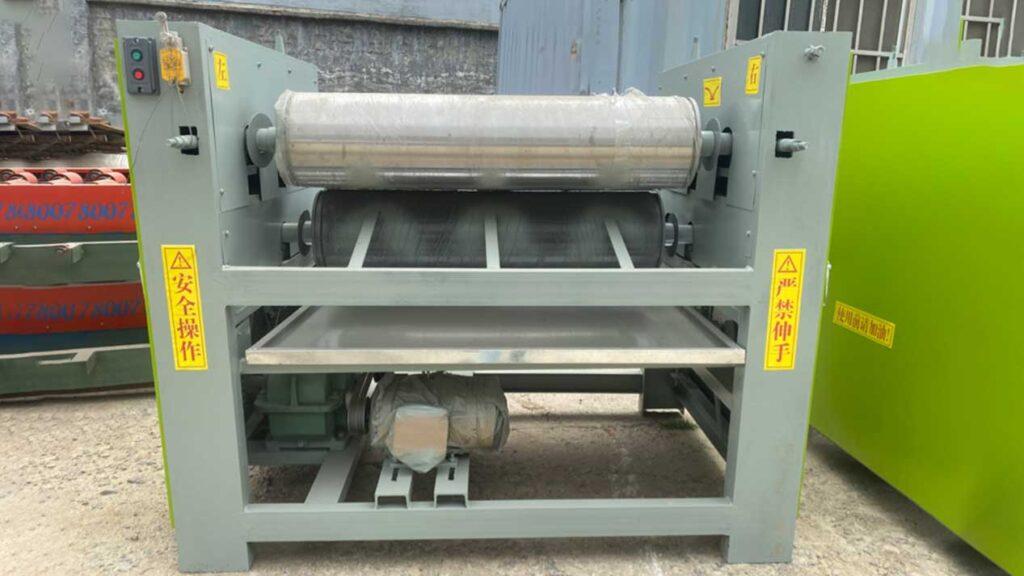
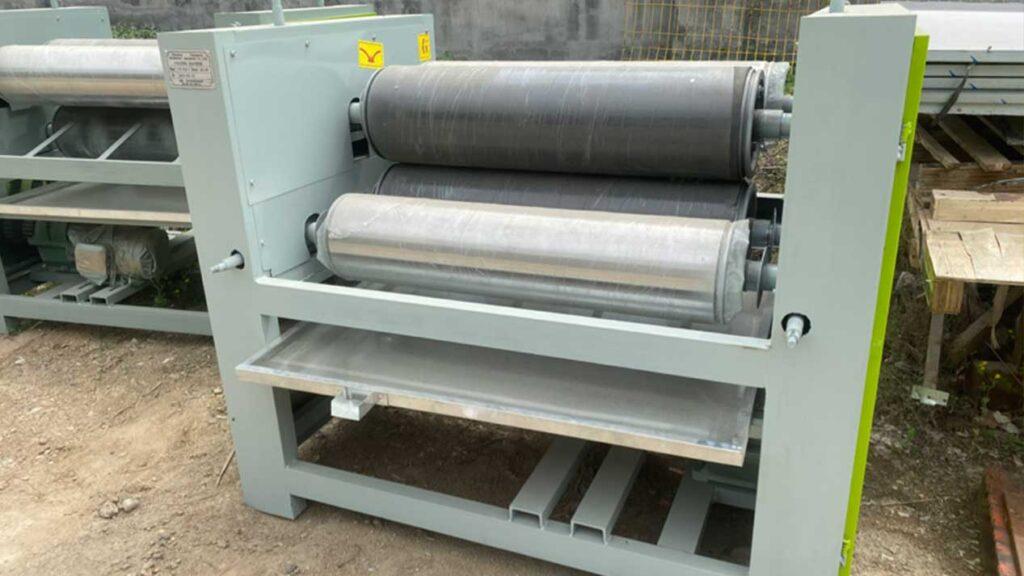
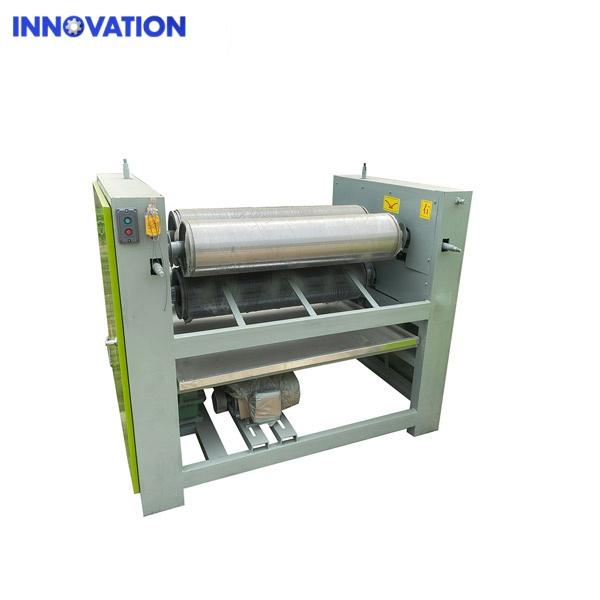
Before diving into the techniques, it is essential to understand what a Glue Spreader is and why it is critical for woodworking. A Glue Spreader is a tool designed to evenly distribute adhesive over a wood surface. They can be made of metal, plastic, or silicone, and may vary in size and shape to suit different applications.
Types of Glue Spreaders
Flat Spreaders: Perfect for large panels and table tops, providing uniform glue layers.
Notched Spreaders: Ideal for applying glue in patterns, such as for laminates or veneering, ensuring the right adhesive thickness.
Silicone Spreaders: Flexible and easy to clean, suitable for curved surfaces or intricate joints.
Mini Spreaders: Small and precise, ideal for corners, edge joints, or delicate woodworking pieces.
Choosing the Right Glue Spreader for Your Project
Selecting the right Glue Spreader depends on several factors: surface size, type of adhesive, joint complexity, and desired finish. For example, PVA wood glue is best applied with a notched spreader, while epoxy or polyurethane glue may require a silicone spreader to prevent sticking.
7 Powerful Glue Spreader Techniques for Woodworking
These techniques will elevate your woodworking projects and ensure maximum efficiency and precision.
Technique 1 – Even Pressure Application
Apply consistent pressure across the spreader while distributing the adhesive. Uneven pressure can lead to dry spots or glue buildup. Professional woodworkers recommend holding the spreader at a slight angle to increase control and prevent dripping.
Technique 2 – Using Notch Patterns for Laminates
When working with laminate sheets, a notched Glue Spreader ensures the adhesive layer is uniform and prevents air pockets. Different notch sizes correspond to different adhesive thicknesses, so choose according to manufacturer guidelines.
Technique 3 – Edge-to-Edge Spreading
Ensure the glue covers the entire edge of the panel or board. Missing corners or edges can compromise the bond and reduce structural integrity. A mini spreader is highly effective for tight corners.
Technique 4 – Thin Layer Application for Fast Curing
Applying a thin adhesive layer ensures faster curing and reduces glue squeeze-out. For quick assembly projects, spreading glue thinly also saves material and minimizes sanding later.
Technique 5 – Temperature and Humidity Considerations
Wood and adhesive respond to environmental conditions. Using a Glue Spreader when the surface is slightly warm can improve glue penetration, while high humidity may require slightly thinner layers to prevent long drying times.
Technique 6 – Cleaning and Maintenance
A well-maintained Glue Spreader performs better and lasts longer. Clean the spreader immediately after use, especially when using fast-setting adhesives. Silicone spreaders can often be rinsed under warm water, while metal spreaders may require scraping.
Technique 7 – Combining Tools for Complex Surfaces
For intricate designs, combining a large spreader with a mini spreader or brush ensures adhesive reaches all nooks and crannies. This technique is particularly useful for ornate furniture, carvings, or decorative panels.
Practical Comparison Table
| Technique | Best For | Material Type | Efficiency Impact | Expert Recommendation |
|---|---|---|---|---|
| Even Pressure Application | Large panels | Plywood, MDF | High | Hold at 15° angle |
| Notch Patterns | Laminates | Veneer, laminate sheets | Medium-High | Use appropriate notch size |
| Edge-to-Edge Spreading | Corners, joints | All wood types | High | Mini spreader for tight edges |
| Thin Layer Application | Fast-curing projects | PVA, epoxy | Medium | Apply in 1–2mm layer |
| Temperature & Humidity Adjustment | Seasonal projects | All adhesives | Medium | Warm surfaces improve bonding |
| Cleaning & Maintenance | Repeated use | All spreader types | High | Rinse immediately after use |
| Combining Tools | Complex designs | Carvings, ornate panels | High | Use multiple spreaders for precision |
Advantages of Using a Glue Spreader Correctly
Improved Bond Strength
Correct use of a Glue Spreader ensures the adhesive forms a uniform film across the bonding surface, which significantly increases joint integrity. Research conducted by the Timber Engineering Research Institute indicates that wood joints with evenly applied adhesive exhibit 18–25% higher tensile and shear strength than joints with uneven or manually applied glue. The uniform layer created by a spreader also improves penetration into the wood fibers, leading to stronger long-term adhesion, especially in hardwood applications.
Reduced Material Waste
When glue is poured or brushed on manually, overuse is extremely common—often 15–30% more adhesive than necessary. A Glue Spreader controls output, ensuring just the right amount of adhesive is used for each square inch. This reduces unnecessary consumption and lowers overall project costs. Industrial case studies from cabinet manufacturing facilities show that switching to spreaders can reduce adhesive waste by 12–18% per project, demonstrating clear cost-efficiency benefits for both small workshops and commercial operations.
Enhanced Finish Quality
A consistent and properly measured glue layer helps avoid common finishing problems such as visible glue lines, staining, and blotches on stained wood. Glue squeeze-out is a major contributor to surface imperfections, especially when finishing with oil-based or pigmented coatings. By applying glue precisely where it is needed, a Glue Spreader minimizes squeeze-out and ensures a smoother, cleaner surface. Professional finishers report that proper spreading reduces sanding time on joints by up to 40%, improving both efficiency and finished appearance.
Time Efficiency
Workshops that use a Glue Spreader report significantly faster assembly times. Because adhesive distribution is quicker and more uniform, clamping stages can begin sooner, and the risk of rework is greatly reduced. According to a 2023 operational efficiency study in a woodworking production line, using spreaders improved assembly speed by an average of 10–15%, particularly in repetitive tasks like panel assembly or cabinet manufacturing. Less time spent correcting mistakes or cleaning excess glue translates directly into higher productivity.
Versatility
One of the greatest advantages of a Glue Spreader is its adaptability to different woodworking materials. Whether you’re working with porous woods like pine, dense hardwoods like maple, or engineered boards such as plywood, MDF, or particleboard, a spreader ensures controlled and appropriate glue application. The tool is also widely used for laminates, veneer sheets, composite materials, and even specialty surfaces like curved forms or carved panels. Because of this versatility, professionals in cabinetry, furniture production, flooring, and decorative woodworking rely on spreaders as a universal adhesive tool for a wide range of project types.
FAQ
How do I choose the right Glue Spreader for different adhesives?
Select based on adhesive viscosity and surface size. Notched spreaders work best for PVA glue, silicone spreaders for epoxy or polyurethane adhesives.
Can a Glue Spreader be used on uneven surfaces?
Yes, flexible silicone or small mini spreaders adapt to curves and uneven areas. Combining tools often works best for intricate surfaces.
How do I maintain my Glue Spreader?
Clean immediately after use, avoid abrasive scrubbing, and store in a dry place. Regular maintenance prolongs tool life.
What is the ideal layer thickness?
Typically 1–2mm for PVA and 2–3mm for epoxy. Always follow adhesive manufacturer instructions.
Are Glue Spreaders safe for all types of wood?
Yes, they are safe, but softwoods require gentler pressure to avoid denting, and delicate veneers benefit from silicone spreaders.
Conclusion
Mastering Glue Spreader techniques transforms woodworking from a basic task into precise craftsmanship. By following these seven powerful techniques—applying even pressure, using notch patterns, covering edges thoroughly, managing layer thickness, adjusting for environmental conditions, cleaning tools, and combining spreaders—you can maximize bond strength, reduce waste, and improve efficiency.
Whether you are a hobbyist or professional carpenter, understanding these techniques ensures better results, more durable furniture, and a more enjoyable woodworking experience. Investing time to learn Glue Spreader best practices pays off in quality, efficiency, and long-term satisfaction.